Setup guide
Get Buddy running in a few minutes
Seven short steps from a fresh download to asking Buddy your first question. Follow along — there’s a screenshot for each one.
- 01
Install Buddy into Applications
Open the downloaded
Buddy.dmgand drag the Buddy icon onto the Applications folder. Once it copies over, eject the disk image — Buddy now lives where every other Mac app does.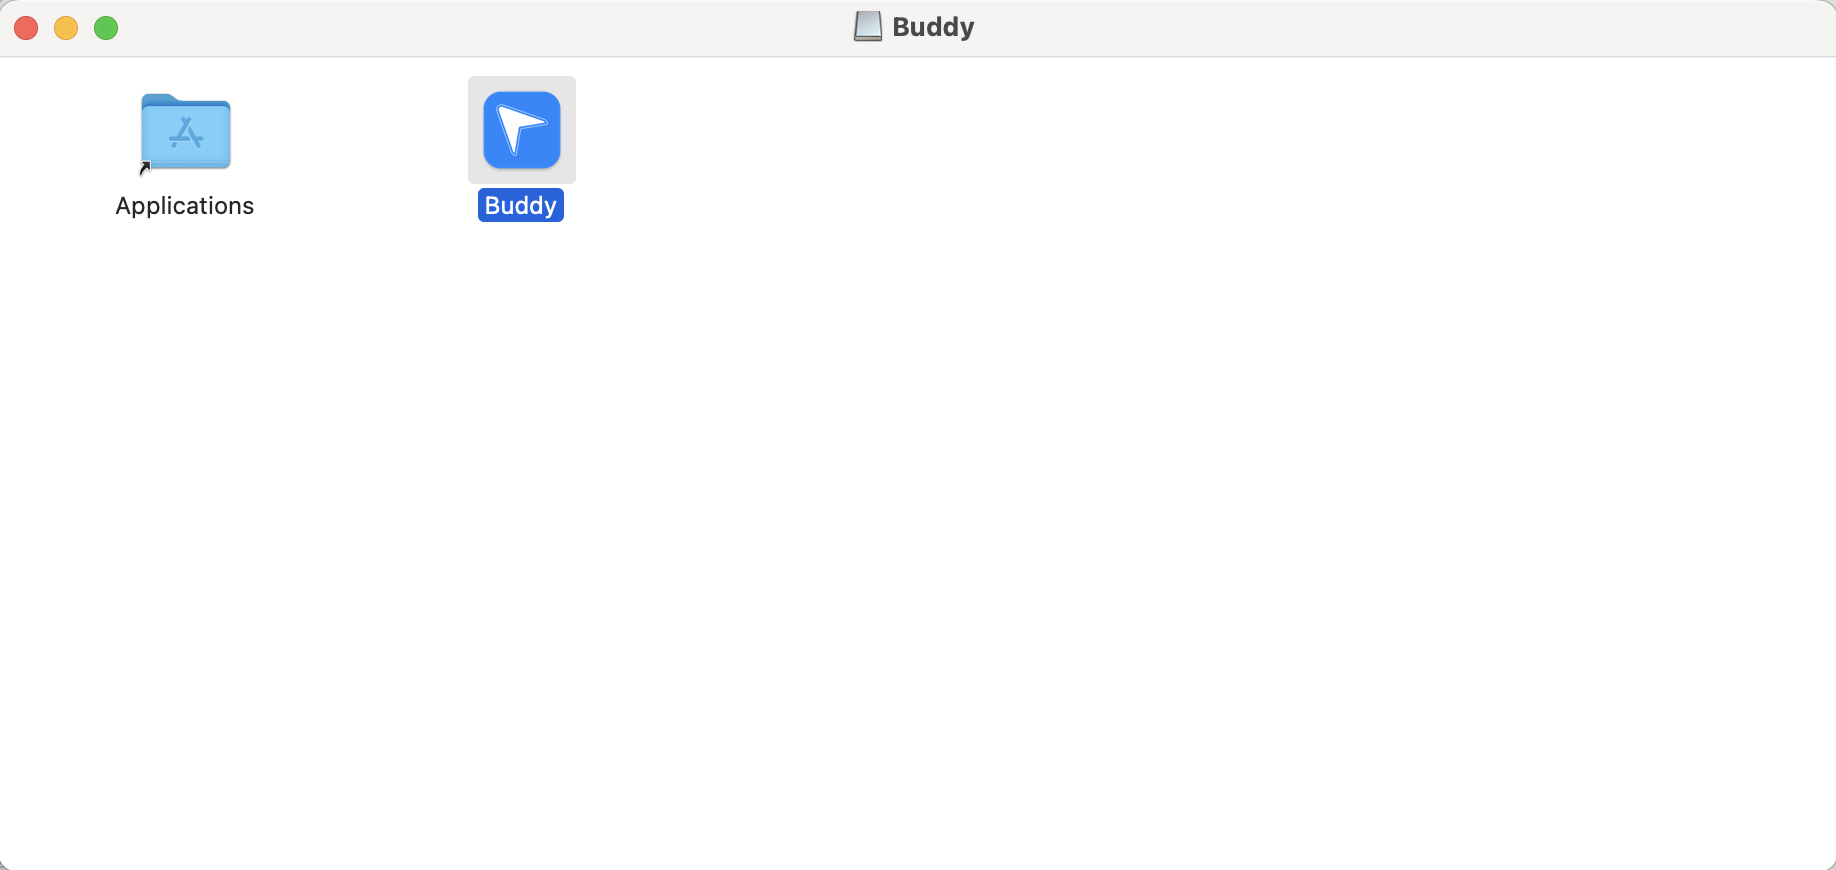
- 02
Open Buddy from Spotlight
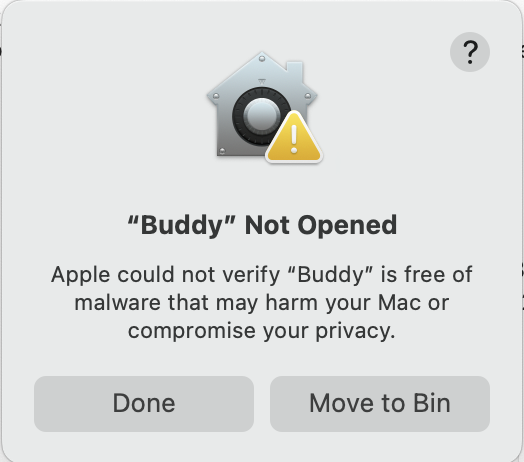
Press ⌘ Space, type Buddy, and hit Return. The first time you launch, macOS shows this Gatekeeper warning because Buddy is not yet notarized through the Apple Developer Program.
You can safely click Donehere — we will let macOS open it from Privacy & Security in the next step.
- 03
Allow Buddy from Privacy & Security
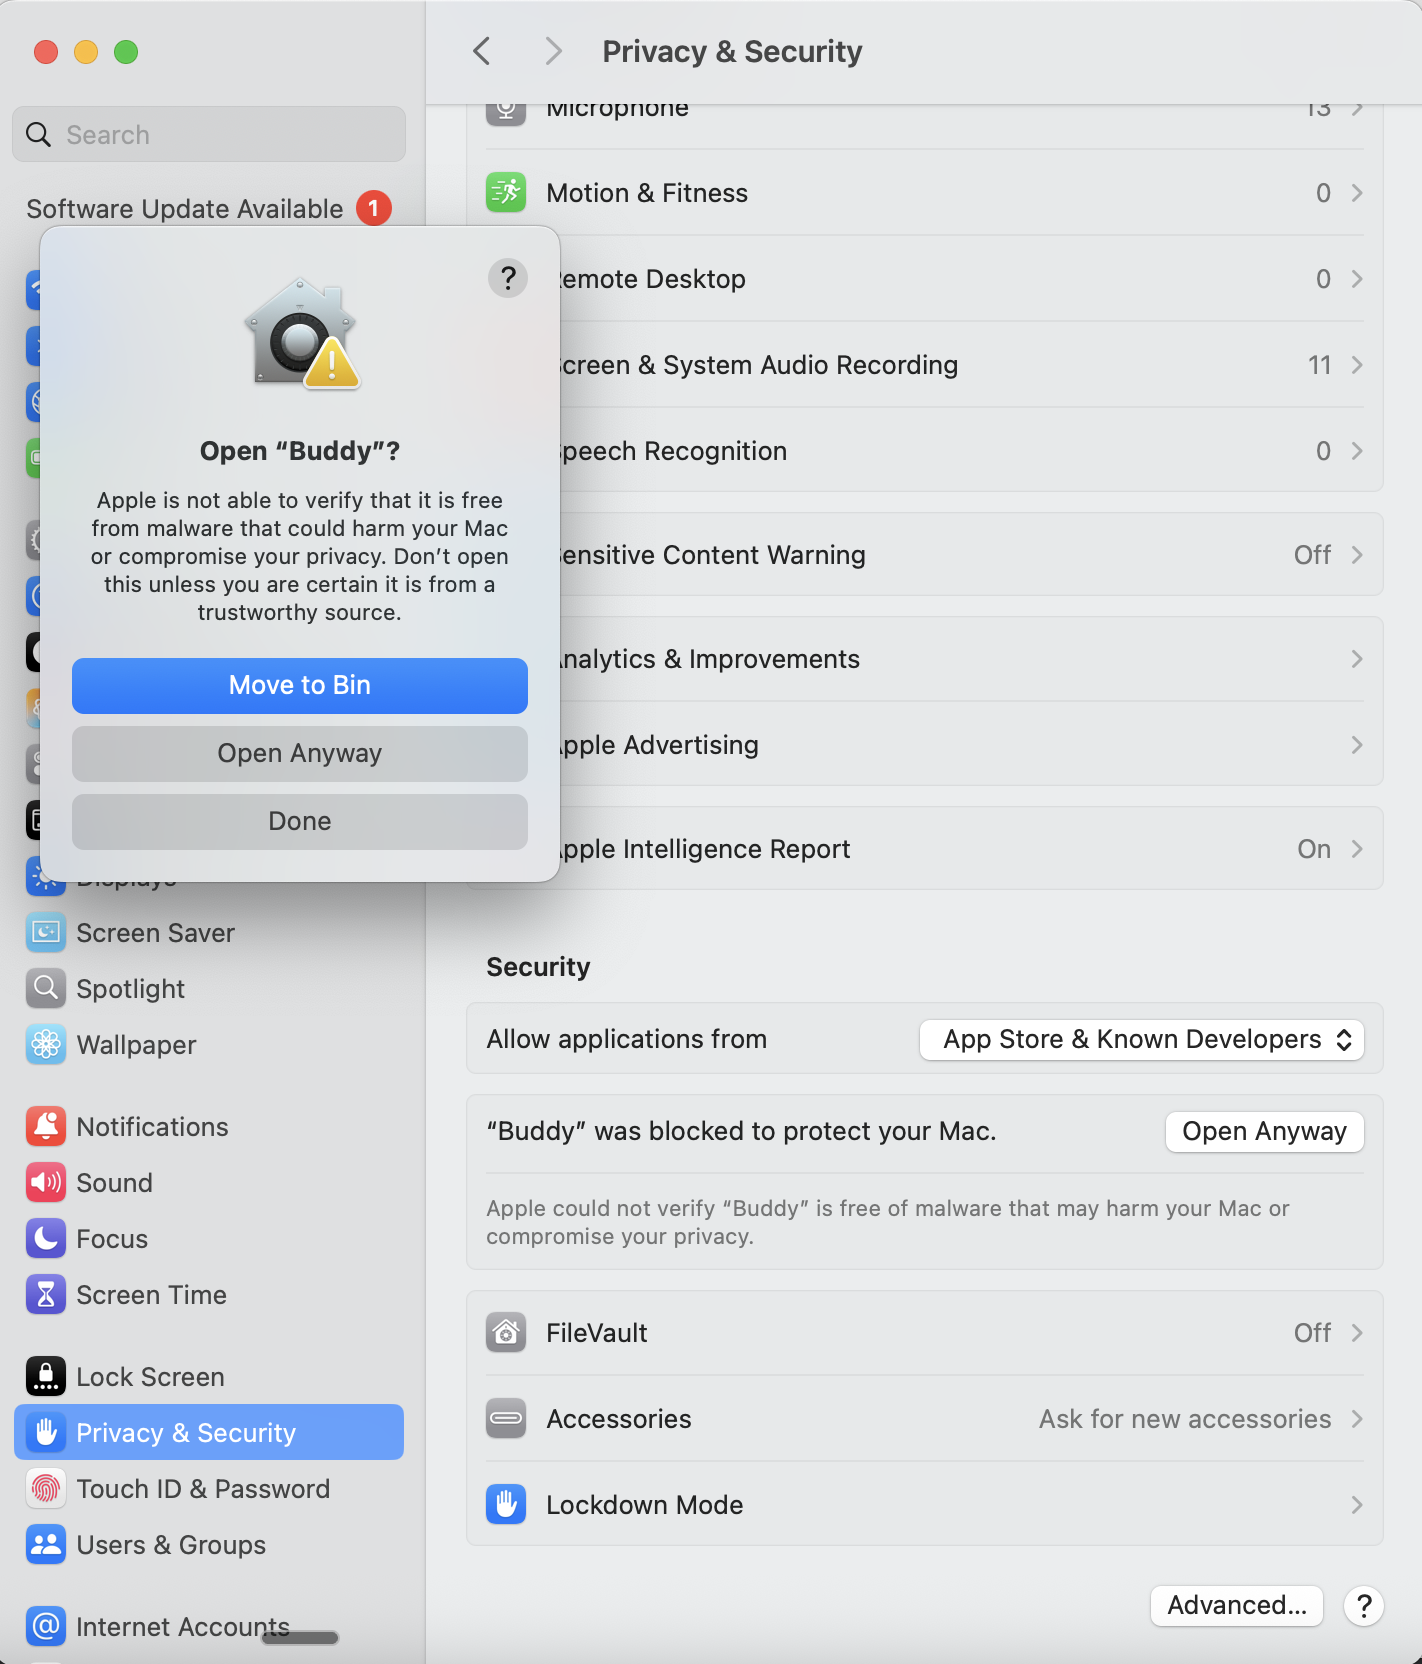
Open System Settings → Privacy & Security and scroll down to the Security section. You will see a row that says “Buddy” was blocked to protect your Mac. Click Open Anyway, authenticate with Touch ID or your password, then click Open Anyway on the confirmation dialog.
You only have to do this once. Future launches and in-app updates run without prompting.
- 04
Find Buddy in your menu bar
Buddy is a menu-bar app — it does not show up in the Dock. Look for the blue arrow icon in the top-right of your screen. Once you see it, you are halfway there.
Don’t see the icon? macOS limits how many menu-bar items can show at once. If your menu bar is crowded (Bluetooth, audio, calendar widgets, etc.), Buddy may be hidden. Quit a few menu-bar apps or use a tool like Hidden Bar / Bartender to make room, and Buddy will appear.

- 05
Open the Buddy panel
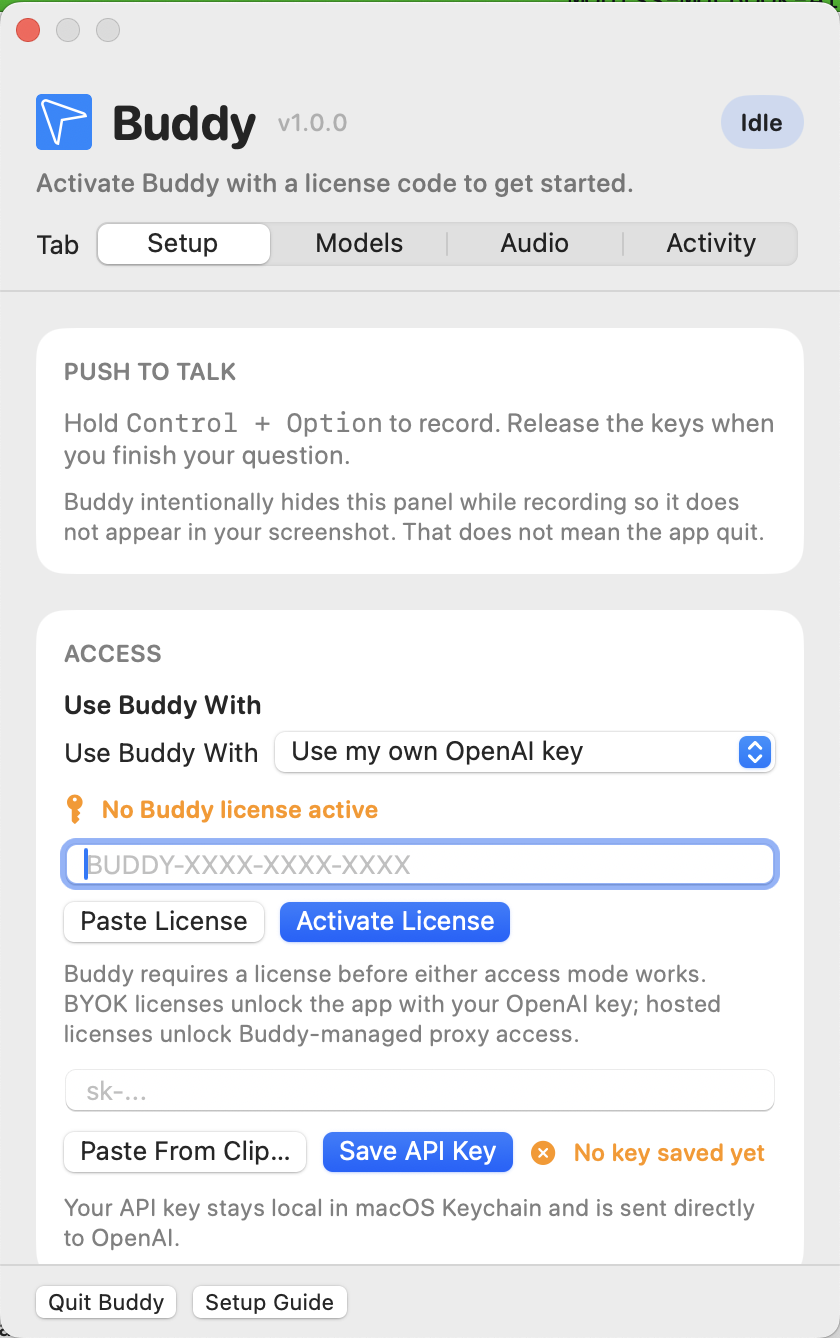
Click the menu-bar icon to open the Buddy panel. This is where you pick between BYOK and Hosted access, paste your license, choose a voice, and configure models. The Setup tab is the one you want for first-run.
- 06
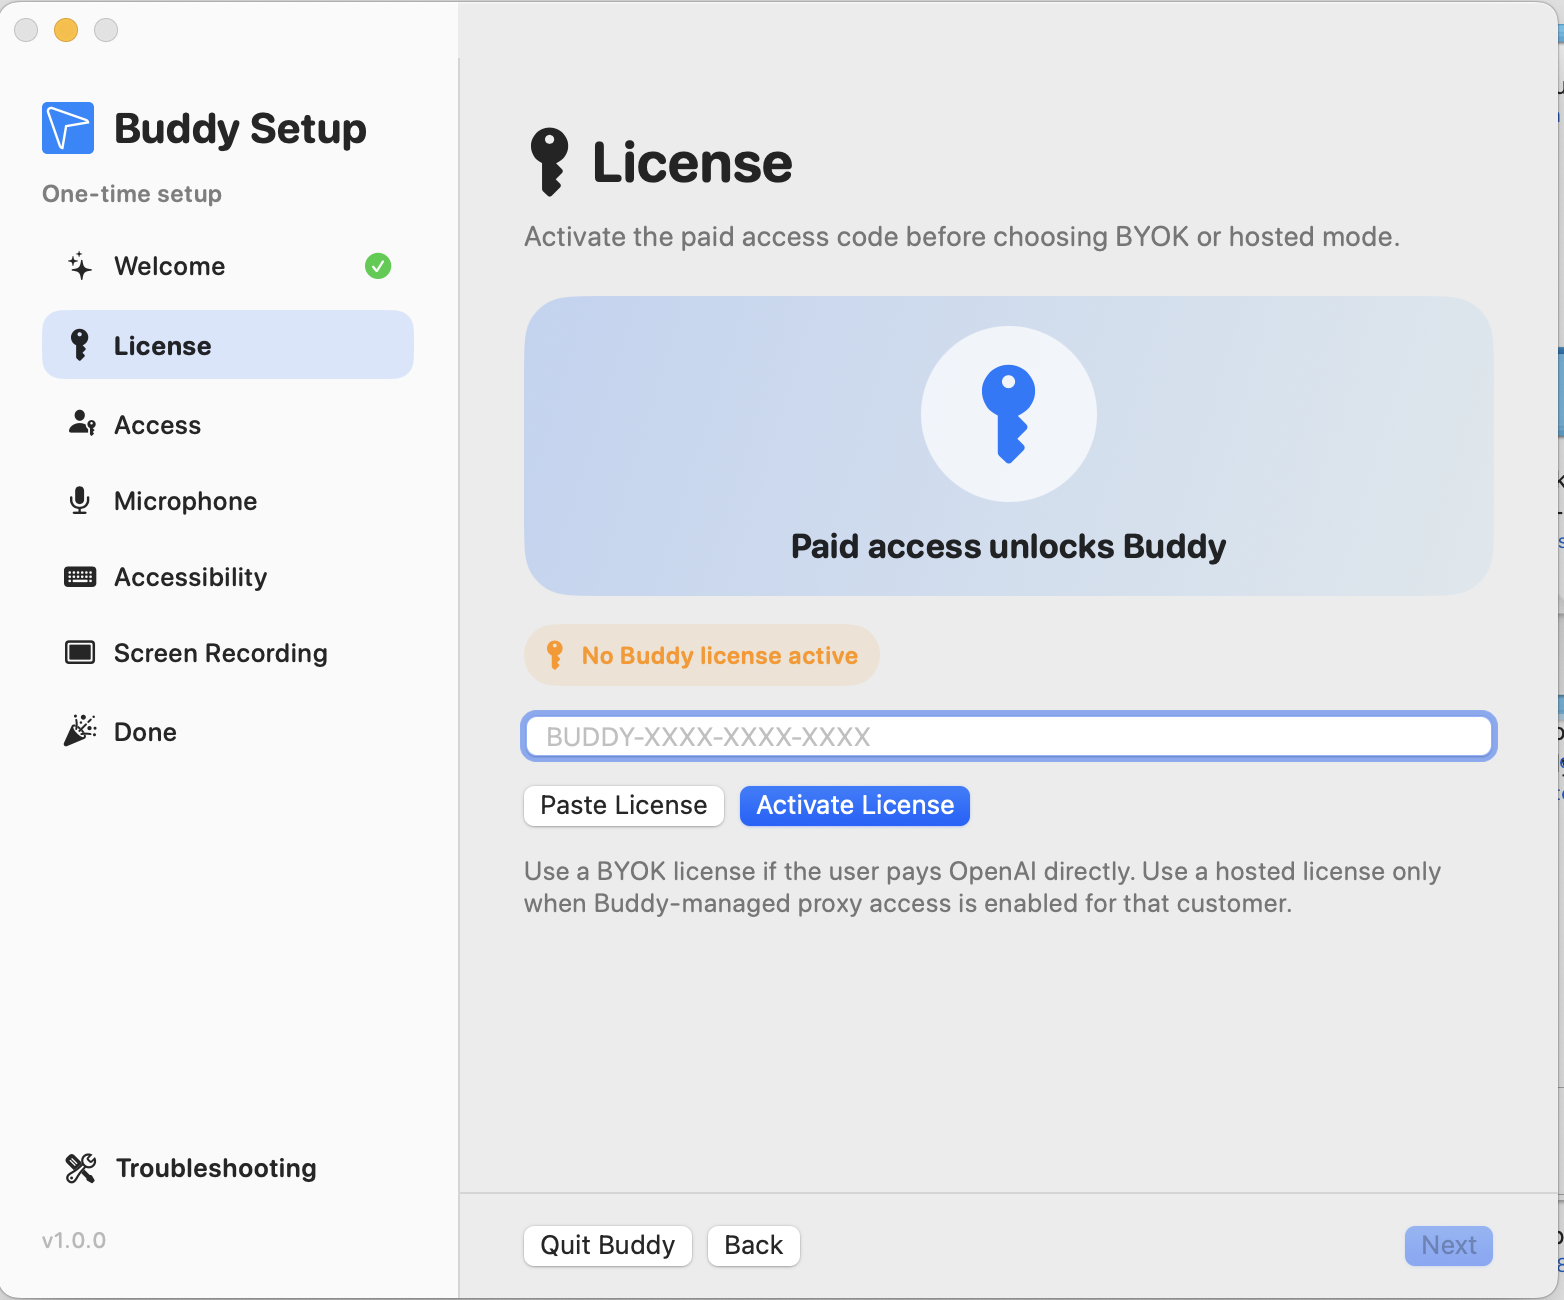
Run the Setup Guide and activate your license
Click Setup Guide at the bottom of the panel to launch the one-time onboarding window. It walks you through Welcome, License, Access, Microphone, Screen Recording, Accessibility, and a quick test run. Paste your activation key on the License step, click Activate License, and grant the three permissions when macOS asks.
- 07
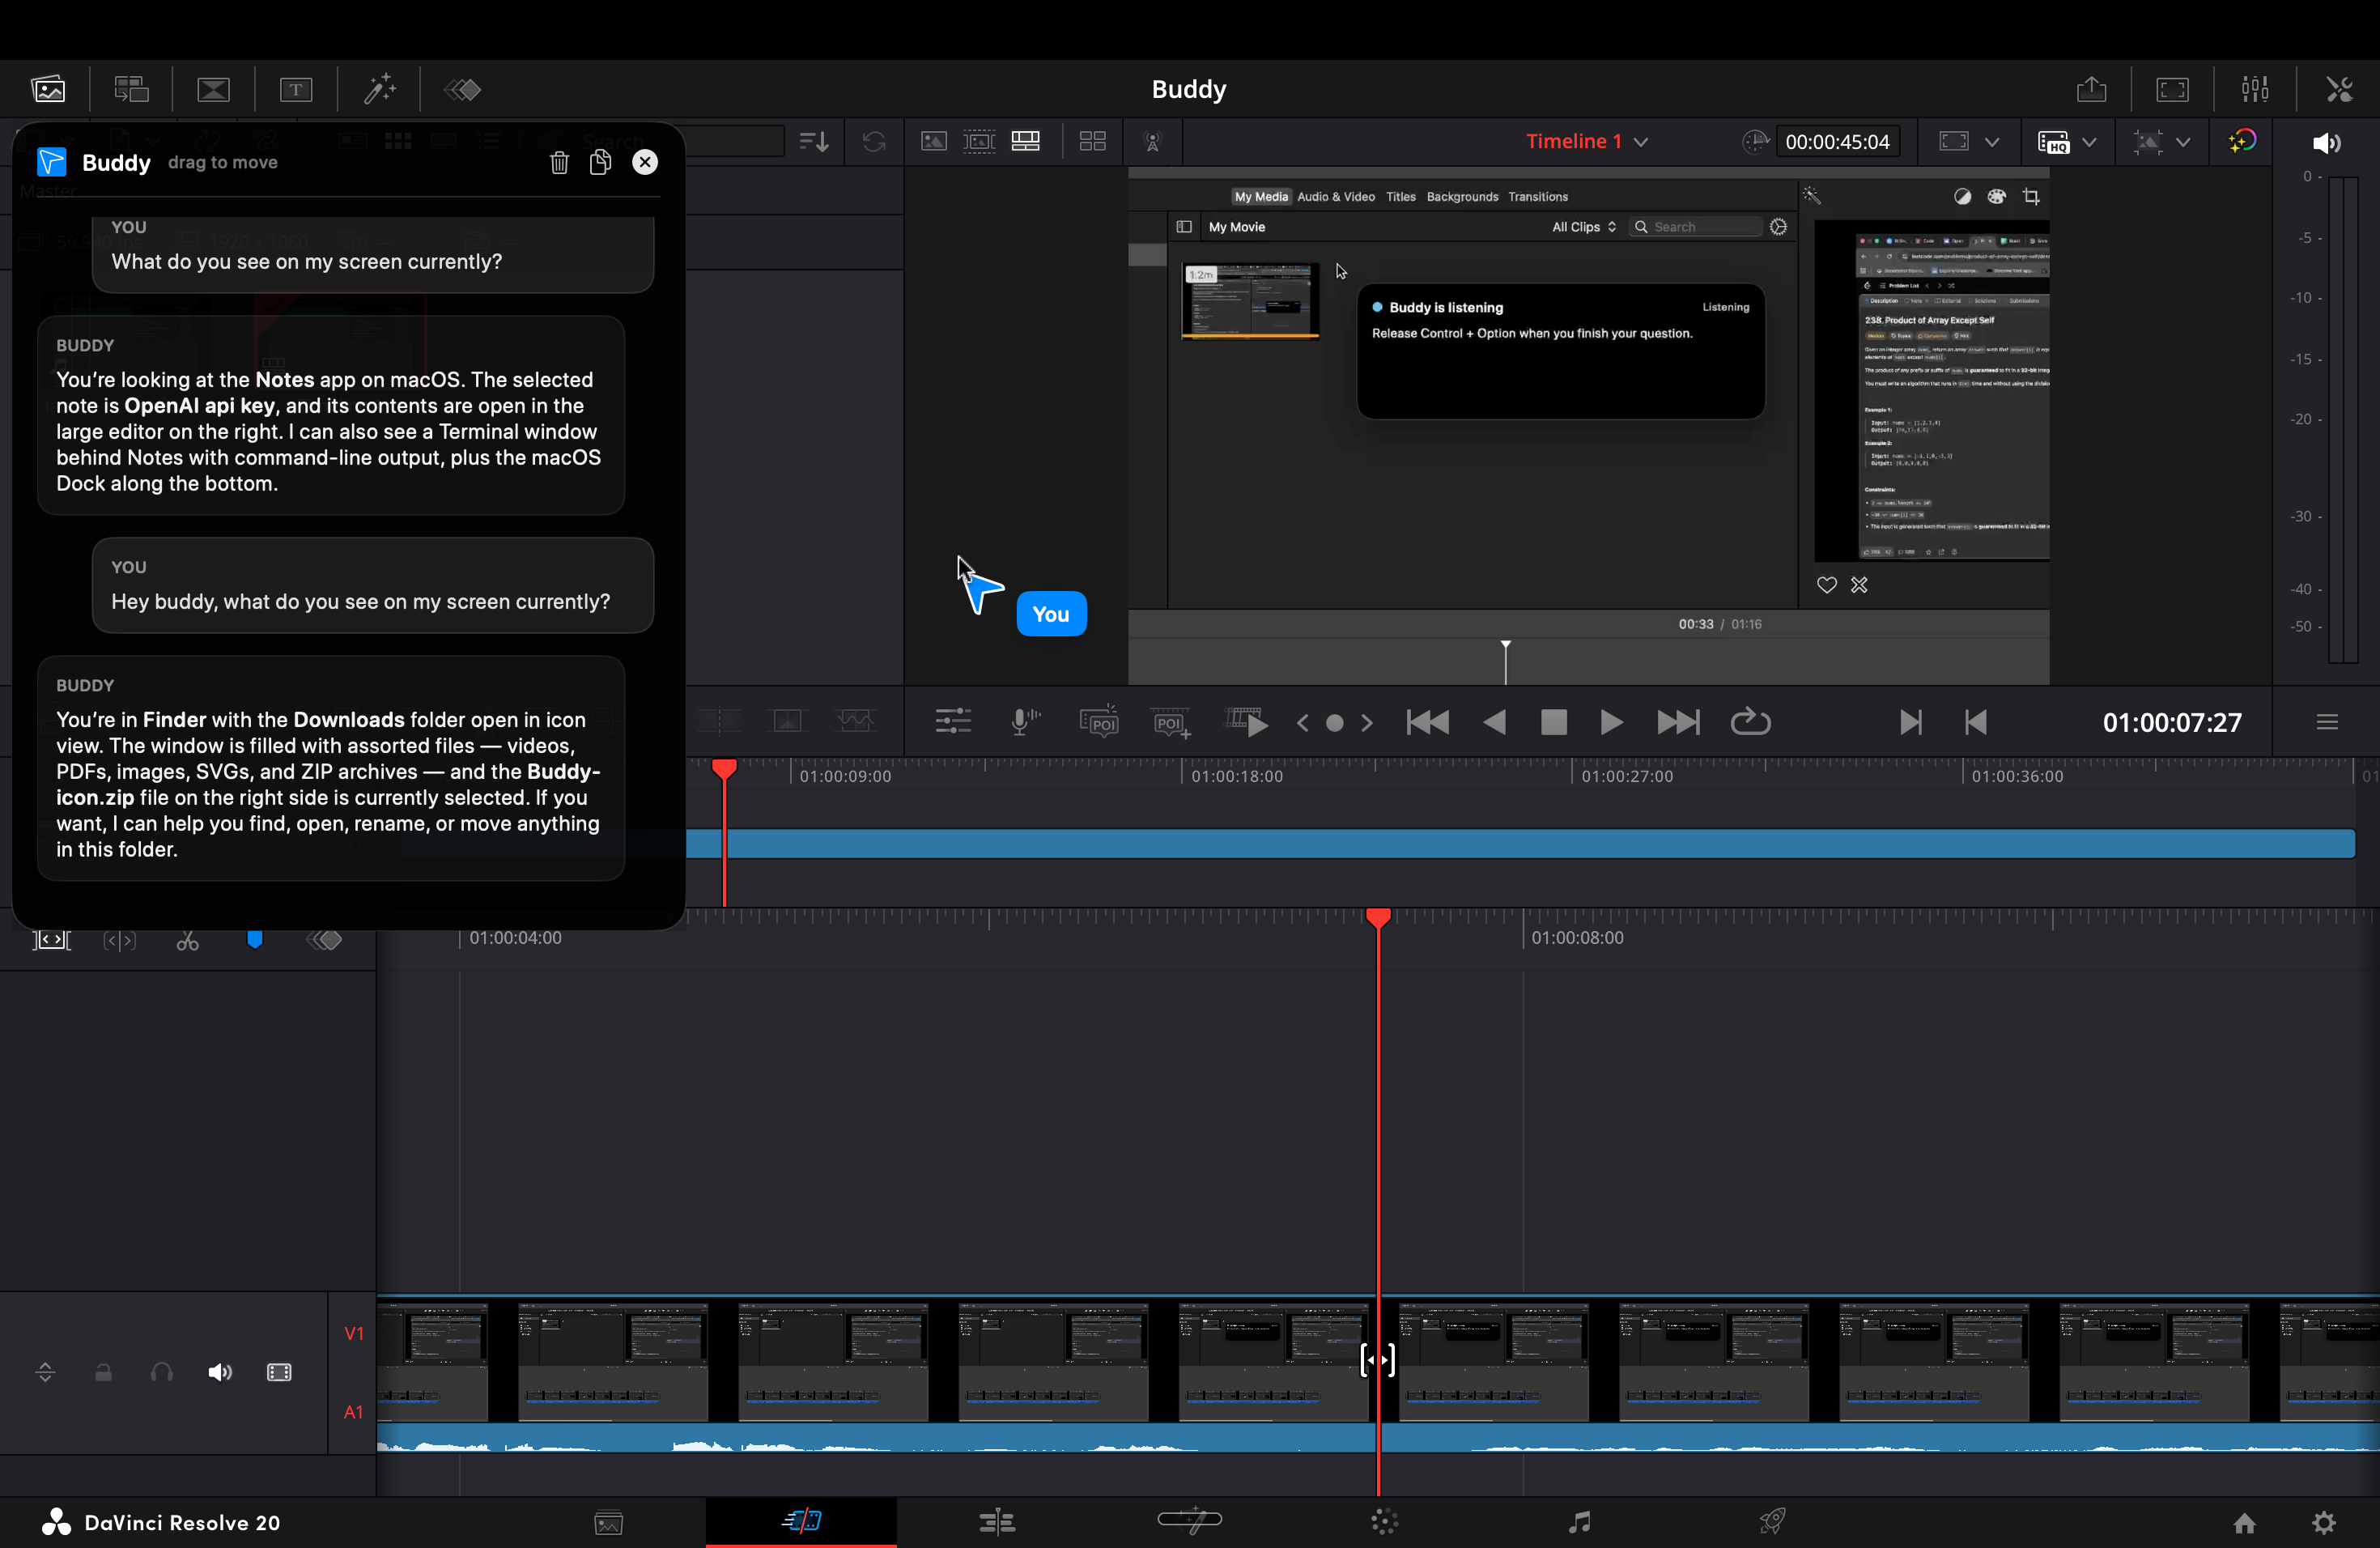
Hold Control + Option and ask anything
You’re done. Hold Control + ⌥ Option, ask whatever is on your mind — about what is on your screen or anything else — and Buddy answers out loud, right next to your cursor.
In this example, Buddy is helping inside DaVinci Resolve while editing a video.
Stuck on any step?
Email monisazeem@gmail.com with a screenshot of where you got stuck and we’ll get you running.